![]()
Swoole 进程模型
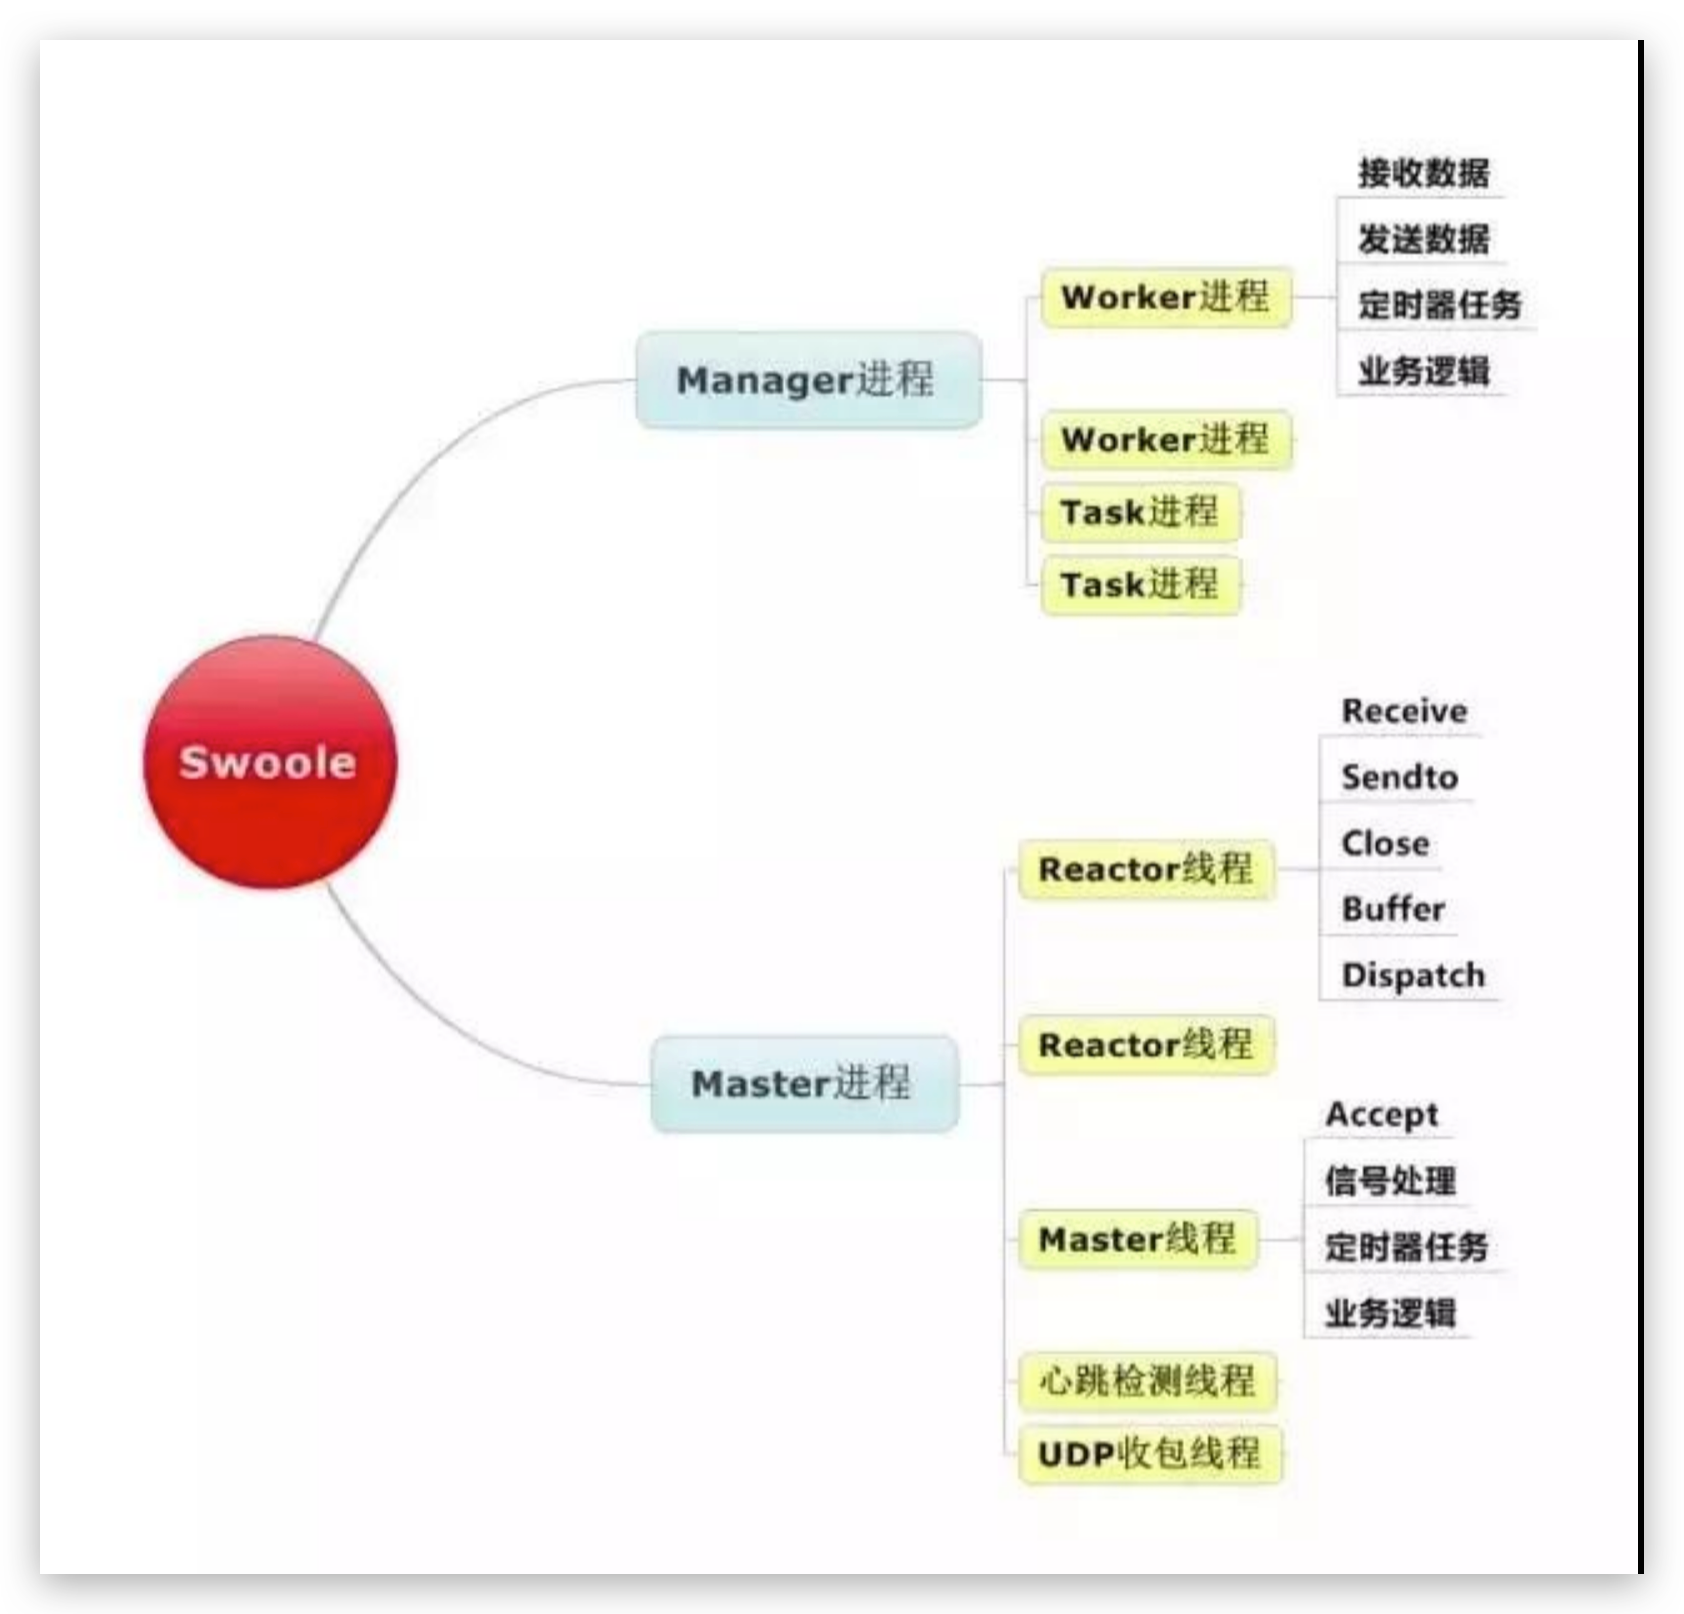
收藏一下 总是忘记这张图 .
Swoole 进程模型
从上图中可以看出,Swoole 在启动后会创建 Master 进程和 Manager 进程。Master 进程会创建 Master 线程、Reactor 线程、心跳检测线程等,Manager 进程会创建 Worker 进程和 Task 进程。
Swoole 的线程和进程之间分别有什么作用呢?
Master 进程这个进程是 swoole 的核心进程,也是一个多线程的进程,一个 Master 线程和多个 Reactor 进程,Reactor 线程的数量可以配置。
Master 线程 Master 线程用于 accept 新的连接,然后会评估每个 Reactor 线程维护的连接数,最后将这个新的连接分配给连接数量最少的那个 Reactor 线程,从而保证每个 Reactor 线程的负载量是均衡的。Master 线程还负责对所有信号的接管(包括请求处理、重启进程、重载配置等),避免 Reactor 线程收到信号的打扰中断。
Reactor 线程当一个 socket 可读或可写的时候,就由 Reactor 线程将事件转发给 worker 进程。
Manager 进程 Manager 进程管理着 Worker 进程和 Task 进程,Worker 进程和 Task 进程是由 Manager 进程 fork 出来的。Manager 进程会监管 Worker 进程和 Task 进程的状态,当他们意外挂掉时,Manager 进程会重新拉起新的进程,Manager 进程还负责 Worker 进程和 Task 进程的平滑重启。
Worker 进程 Worker 进程是由 Manager 进程 fork 而来,用于处理具体的业务逻辑。Worker 进程可以用同步的方式去干活,也可以用异步的方式去干活。
Task 进程 Task 进程是一种特殊的 Worker 进程,专门用于处理一些比较耗时的操作。Task 进程只能工作在同步的方式下,不能使用异步。所以 Task 进程中不能使用定时器,而 Worker 进程可以。
![]()
The MySQL server is running with the --read-only option so it cannot execute this statement
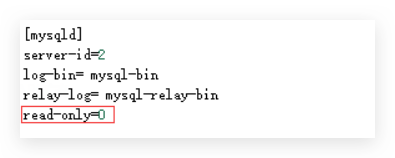
MySQL 只读模式导致的脚本执行失败问题
在使用 MySQL 数据库进行开发和运维时,可能会遇到一些配置导致的意外问题。最近,我在执行数据库脚本时遇到了一个常见错误:“The MySQL server is running with the --read-only option so it cannot execute this statement”。本文将分享这个问题的原因以及如何解决它。
问题背景
在一次服务升级过程中,由于运维同事设置了 MySQL 的只读模式,导致我无法执行写入操作。只读模式是 MySQL 的一个配置选项,它限制了数据库的写入操作,确保数据在特定时间内不会被修改。这种模式通常用于以下场景:
- 数据库备份期间,防止数据被更改。
- 主从复制架构中,从数据库需要保持只读状态,以确保数据一致性。
![]()
Nginx 中 proxy_pass 末尾带斜杠 `/` 和不带的区别
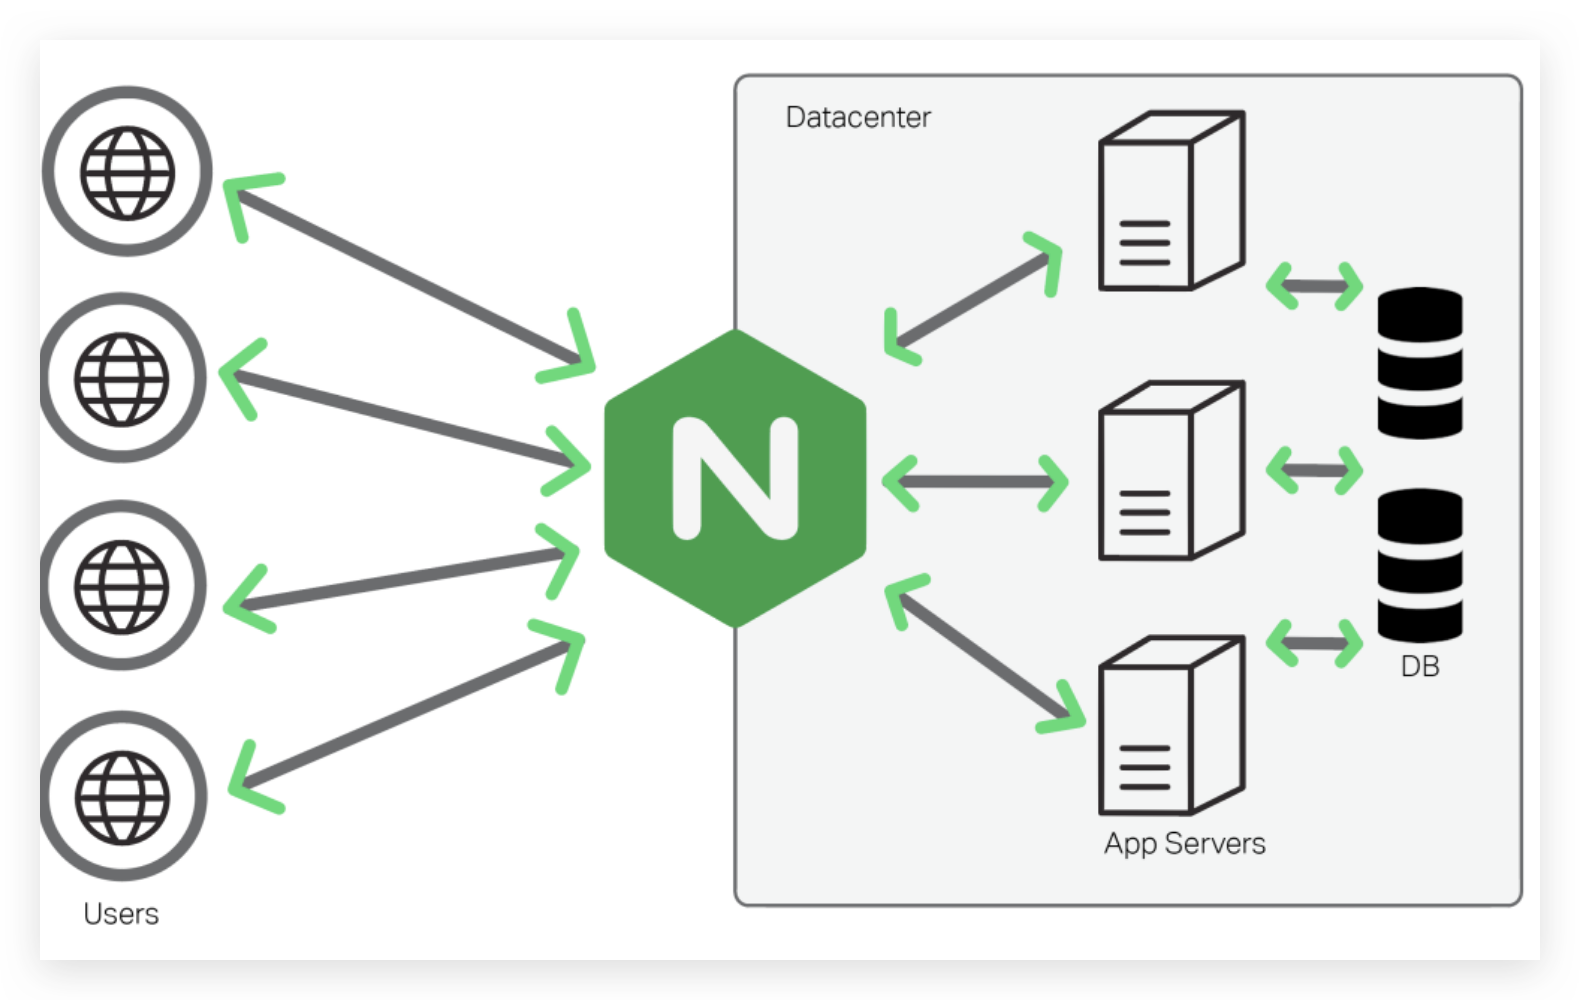
假如要将8080端口上的请求转发至3000端口。
以3000端口为例,编写proxy_pass有两种形式。
假设前端请求为 http://localhost:8080/get/test。
我们暂且把 /get/test称为请求部分。
不带 "/"
 server {
        listen 8080;
        server_name localhost;

        location /get {
            proxy_pass http://localhost:3000;
        }
        #或者
        location /get/ {
            proxy_pass http://localhost:3000;
        }
        #结果都是 将http://localhost:8080/get/test转发去http://localhost:3000/get/test
    }
proxy_pass:http://localhost:3000
无斜杆location匹配到的部分也属于请求的部分。
location无论用/get还是用/get/只要匹配上之后都会将整个请求部分/get/test加到proxy_pass上。
http://localhost:3000+/get/test等于请求http://localhost:3000/get/test。
带 "/"
server {
  listen 8080;
  server_name localhost;
  location /get {
     # 结果是 将http://localhost:8080/get/test转发去http://localhost:3000//test,出错~
     proxy_pass http://localhost:3000/;
   }
   #或者
   location /get/ {
     # 结果是 将http://localhost:8080/get/test转发去http://localhost:3000/test
     proxy_pass http://localhost:3000/;
   }
 }
proxy_pass:http://localhost:3000/。
有斜杆location匹配到的部分只用于匹配,不属于请求部分,需要在请求部分将location匹配到的部分剔除。
location用/get则是http://localhost:3000/+(/get/test -/get)等于请求http://localhost:3000//test
location用/get/则是http://localhost:3000/+(/get/test -/get/)等于请求http://localhost:3000/test
"/" 后面还有路径信息
server {
  listen 8080;
  server_name localhost;
  location /get {
    # 结果是 将http://localhost:8080/get/test转发去http://localhost:3000/abc/test
    proxy_pass http://localhost:3000/abc;
   }
   #或者
   location /get/ {
     # 结果是 将http://localhost:8080/get/test转发去http://localhost:3000/abctest,出错~
     proxy_pass http://localhost:3000/abc;
   }
}
proxy_pass:http://localhost:3000/abc。
同有斜杆的规则,在请求部分剔除location后加在上面即可。
location用/get则是http://localhost:3000/abc+(/get/test -/get)等于请求http://localhost:3000/abc/test
location用/get/则是http://localhost:3000/abc+(/get/test -/get/)等于请求http://localhost:3000/abctest
总结
不带 / 时,可以理解为简单的全路径拼接,不作任何处理
带 / 时, proxy_pass + (原路径 - 匹配规则)
server {
  listen       80;
  server_name  localhost;   # http://localhost/wddd01/xxx -> http://localhost:8080/wddd01/xxx

  location /wddd01/ {
    proxy_pass http://localhost:8080;
  }

  # http://localhost/wddd02/xxx -> http://localhost:8080/xxx
  location /wddd02/ {
    proxy_pass http://localhost:8080/;
  }

  # http://localhost/wddd03/xxx -> http://localhost:8080/wddd03*/xxx
  location /wddd03 {
    proxy_pass http://localhost:8080;
  }

  # http://localhost/wddd04/xxx -> http://localhost:8080//xxx,请注意这里的双斜线,好好分析一下。
  location /wddd04 {
    proxy_pass http://localhost:8080/;
  }

  # http://localhost/wddd05/xxx -> http://localhost:8080/hahaxxx,请注意这里的haha和xxx之间没有斜杠,分析一下原因。
  location /wddd05/ {
    proxy_pass http://localhost:8080/haha;
  }

  # http://localhost/api6/xxx -> http://localhost:8080/haha/xxx
  location /wddd06/ {
    proxy_pass http://localhost:8080/haha/;
  }

  # http://localhost/wddd07/xxx -> http://localhost:8080/haha/xxx
  location /wddd07 {
    proxy_pass http://localhost:8080/haha;
  }

  # http://localhost/wddd08/xxx -> http://localhost:8080/haha//xxx,请注意这里的双斜杠。
  location /wddd08 {
    proxy_pass http://localhost:8080/haha/;
  }
}
![]()
设置Git别名实现在提交前先拉取最新更改
在日常的代码开发工作中,经常需要在提交代码前先拉取最新的更改,以避免冲突和保持团队代码同步。通过设置Git指令别名,我们可以简化这一操作,同时避免一些无用的merge操作,使代码管理变得更加高效。
问题背景
在使用Git进行代码管理时,经常会遇到需要先执行git pull再执行git commit -m的情况。这样做可以确保本地代码库是最新的,避免提交代码时出现冲突。然而,频繁地手动执行这两个命令可能会增加开发人员的工作量,特别是在团队协作中。
解决方案
为了简化这一操作,我们可以通过设置Git别名来实现在提交前先拉取最新更改的功能,同时避免一些无用的merge操作。下面是如何实现的步骤:
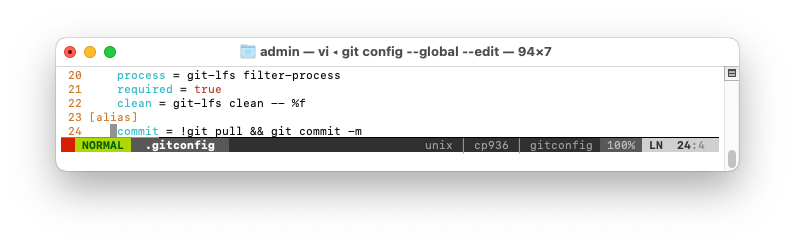
- 打开终端,并输入以下命令来编辑Git配置文件:
git config --global --edit